How to install Meeting Templates for Confluence.
In this video and step-by-step guide you will learn how to install the Meeting Templates for Confluence included in Meetical.
1. In the menu bar go to apps, then manage apps
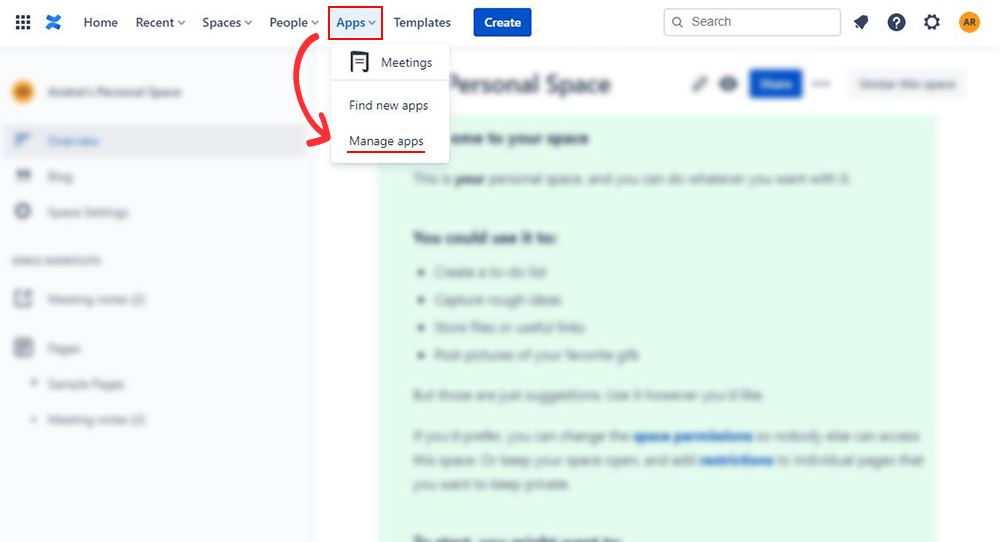
2. Once in Manage apps go to User-installed apps find Meetical for Confluence Cloud and click configure.

3. In the configuration page, under Create meetical templates, click Create templates which will create all the default templates.
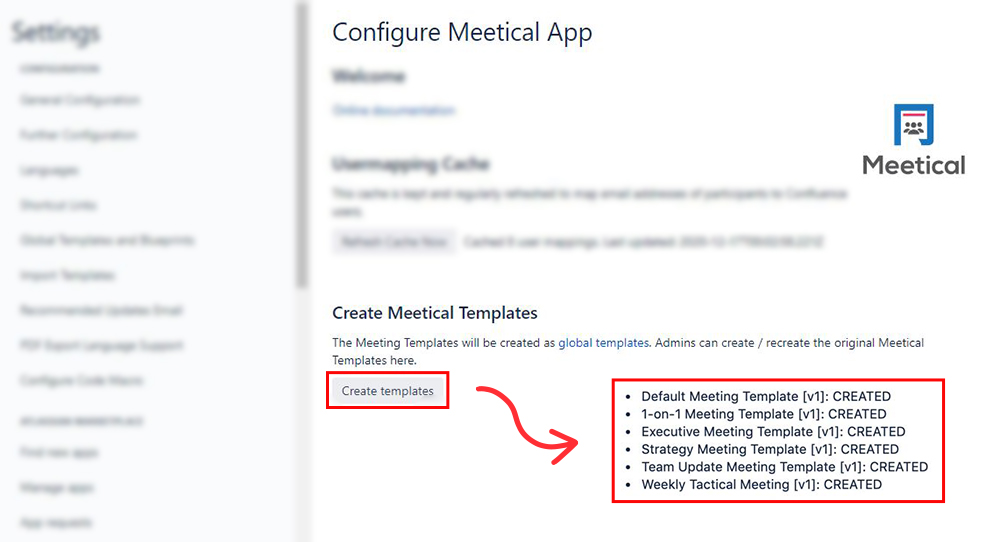
4. Access the templates
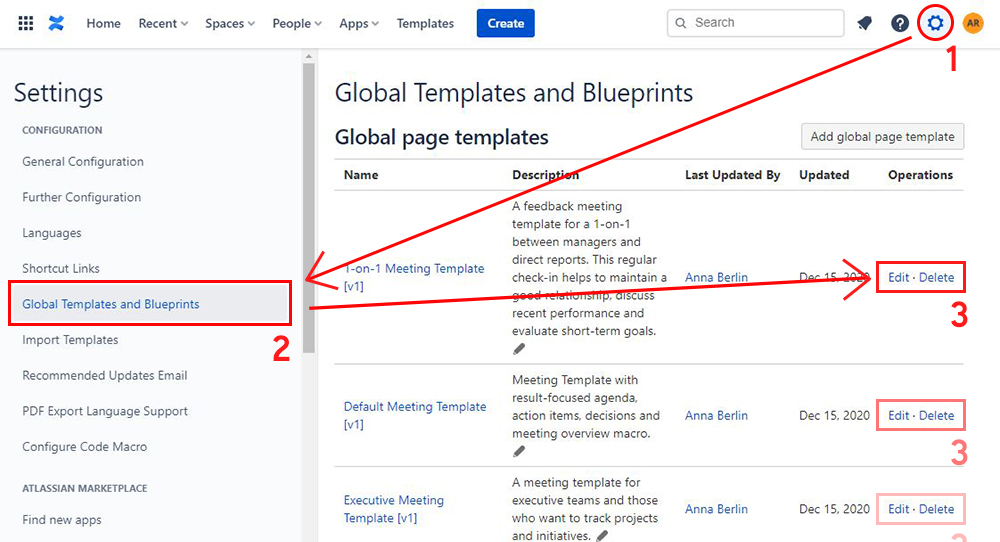
After creating the templates we can edit any of them by going to the settings cog at the top right of the page and navigating to the Global Templates and Blueprints tab found on the left side of the screen.Once there, to edit a template we need to click Edit on the right side of the chosen template.
5. Use macros to show meeting details on your template
Once in the template editor you can use macros. Macros are super useful and can be used for anything from charts and project statuses to specific Meetical functionality.
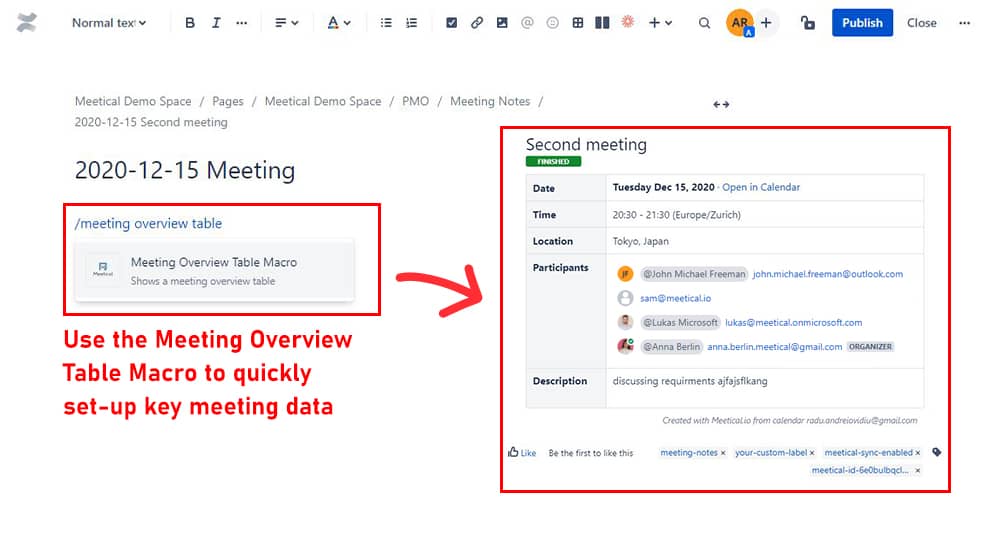
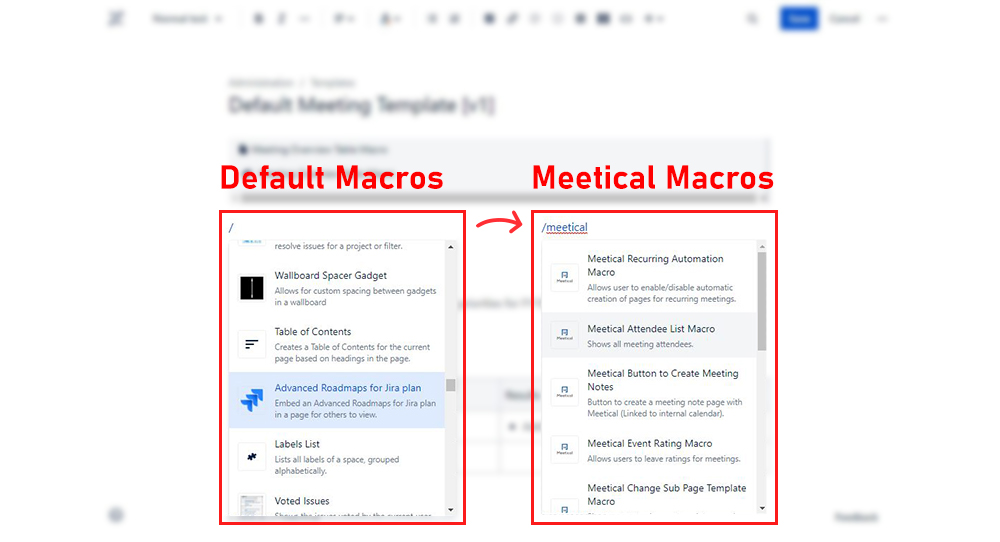
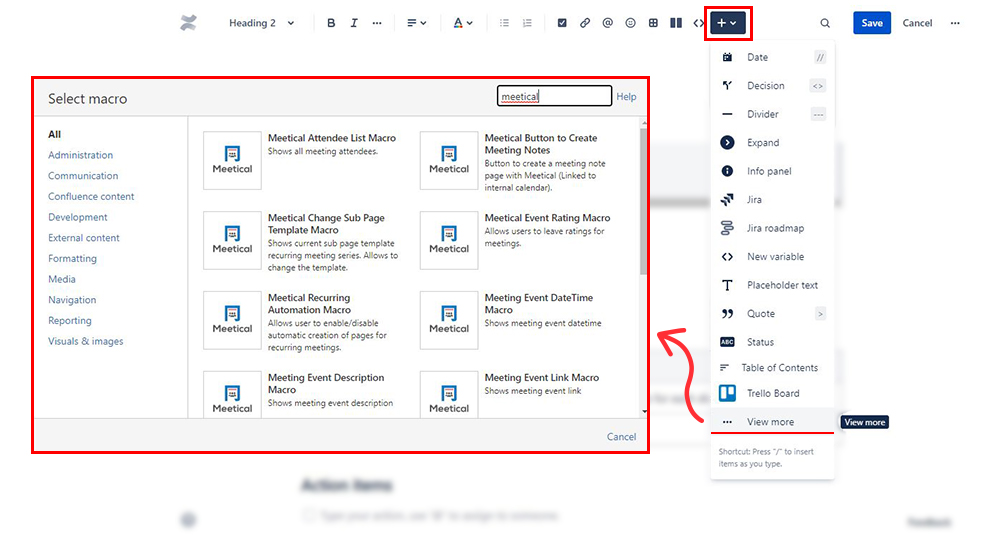
You can add macros by writing "/" or "/meetical"(for Meetical functionality macros) at any point on the page or by accessing the macro menu.
We recommend you start with the Meeting Overview Table macro, which already contains all essential meeting information like date, time, location and the participants.
6. Add text, images and more
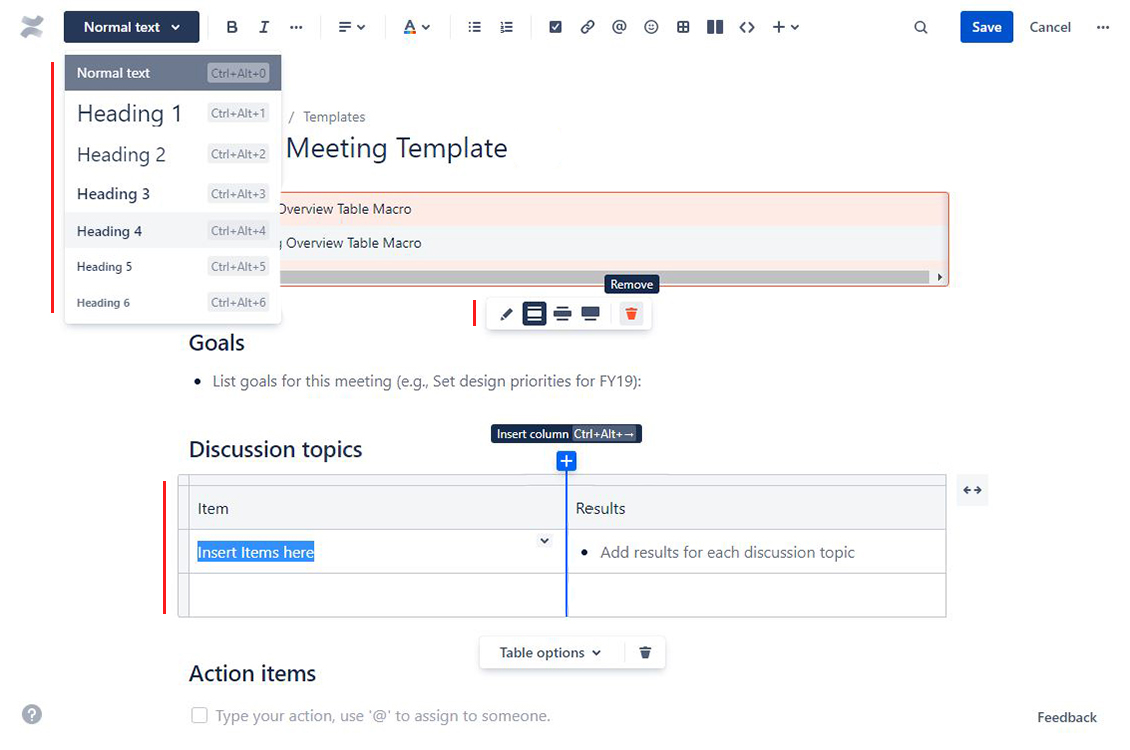
Editing is simple and straight forward. To add or remove information and fields just click on the information you'd like to change or any field you'd like to add information to and edit.
7. Use your edited meeting template from the list
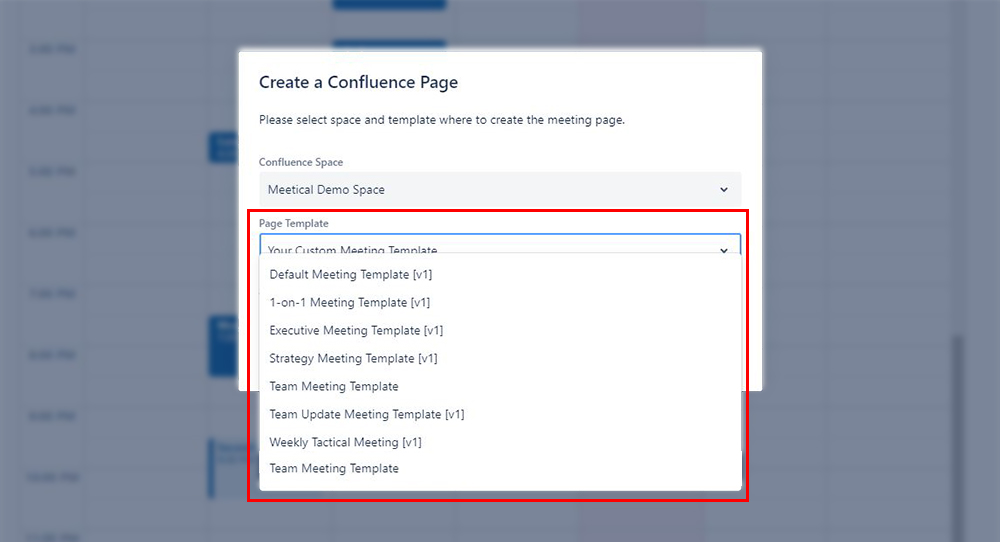
After saving the template it is ready to use. Just pick the template from the list when you create a new meeting.
Thank you. Feedback and questions are very welcome. Reach us at support@meetical.io.


